Table Of Contents
Introduction
In today’s fast-paced world, online food ordering has become a necessity for restaurants. I have built a Food Ordering System which is designed to streamline the food ordering process, enabling customers to order their favorite meals directly from the restaurant’s website. This system is built with a clean and intuitive interface, allowing customers to browse menus, customize orders, and pay online with ease. Restaurant owners can manage orders, update menus, and handle deliveries. Today we are going to discuss detailed application deployment on a standalone ubuntu server.
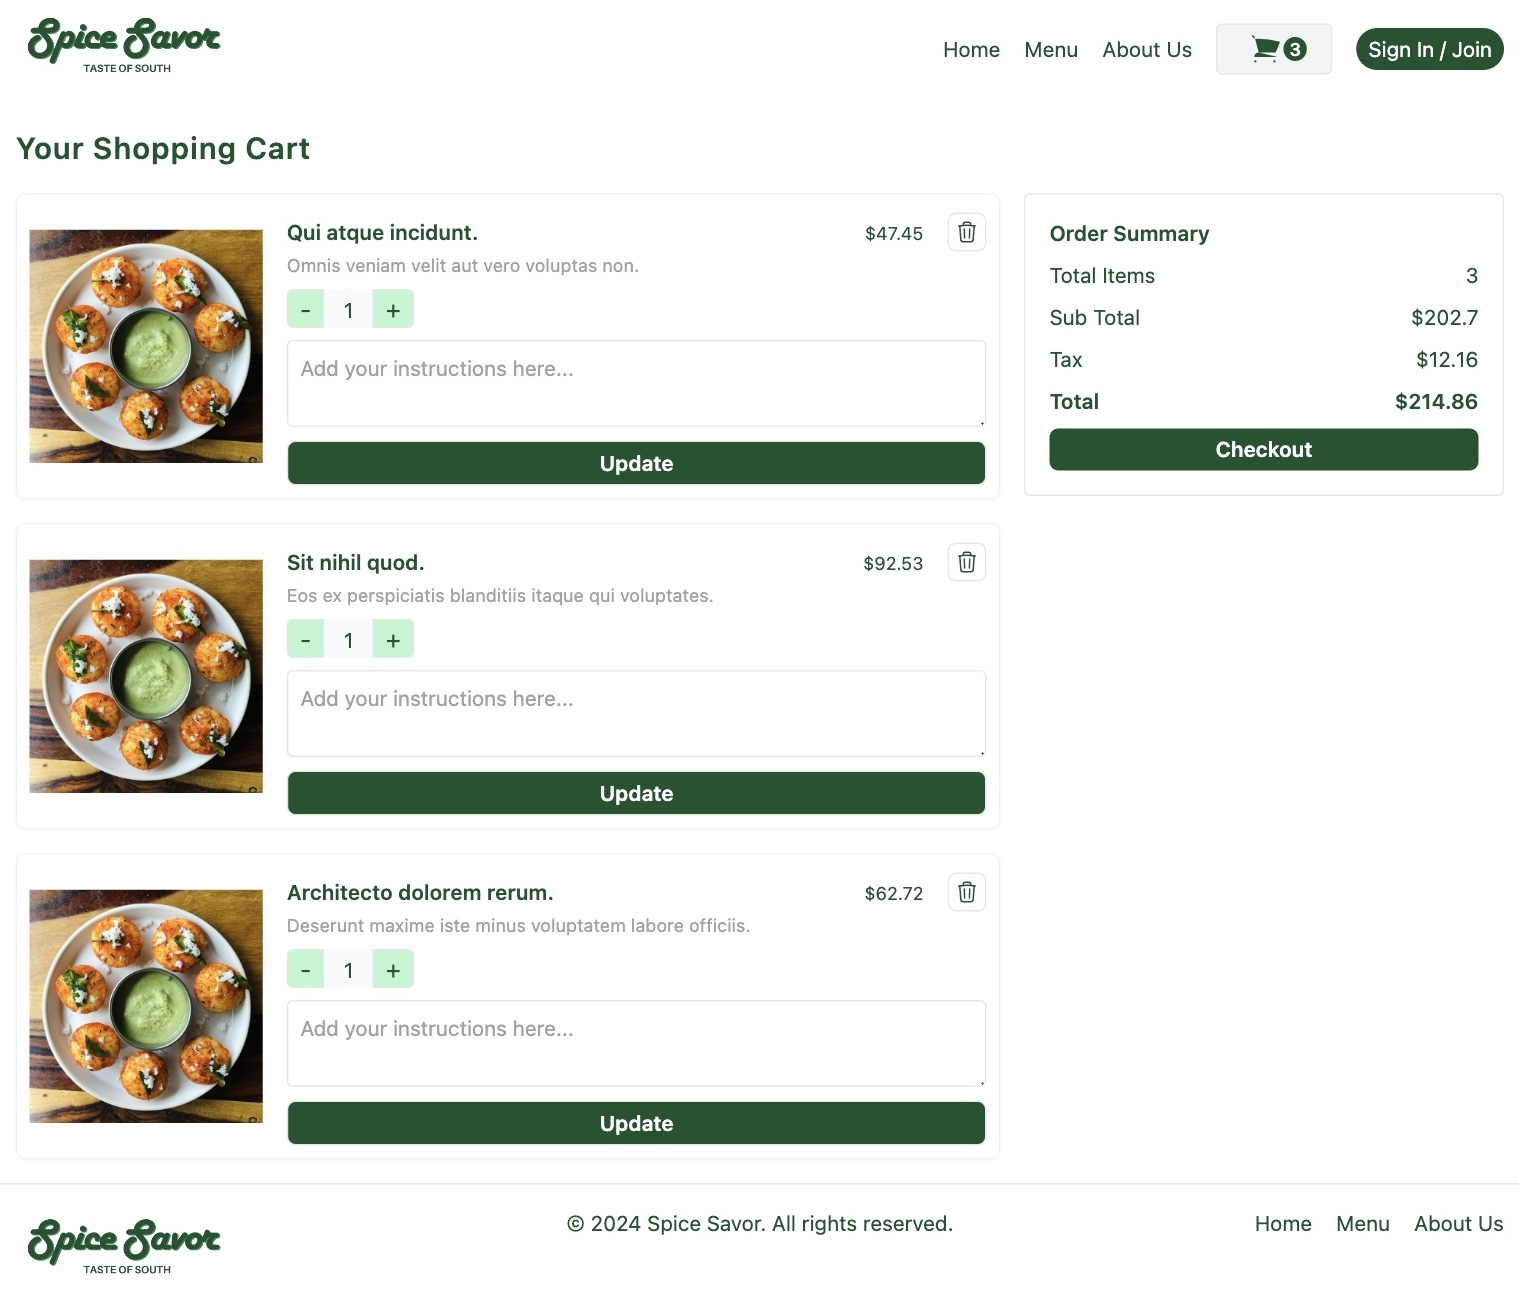
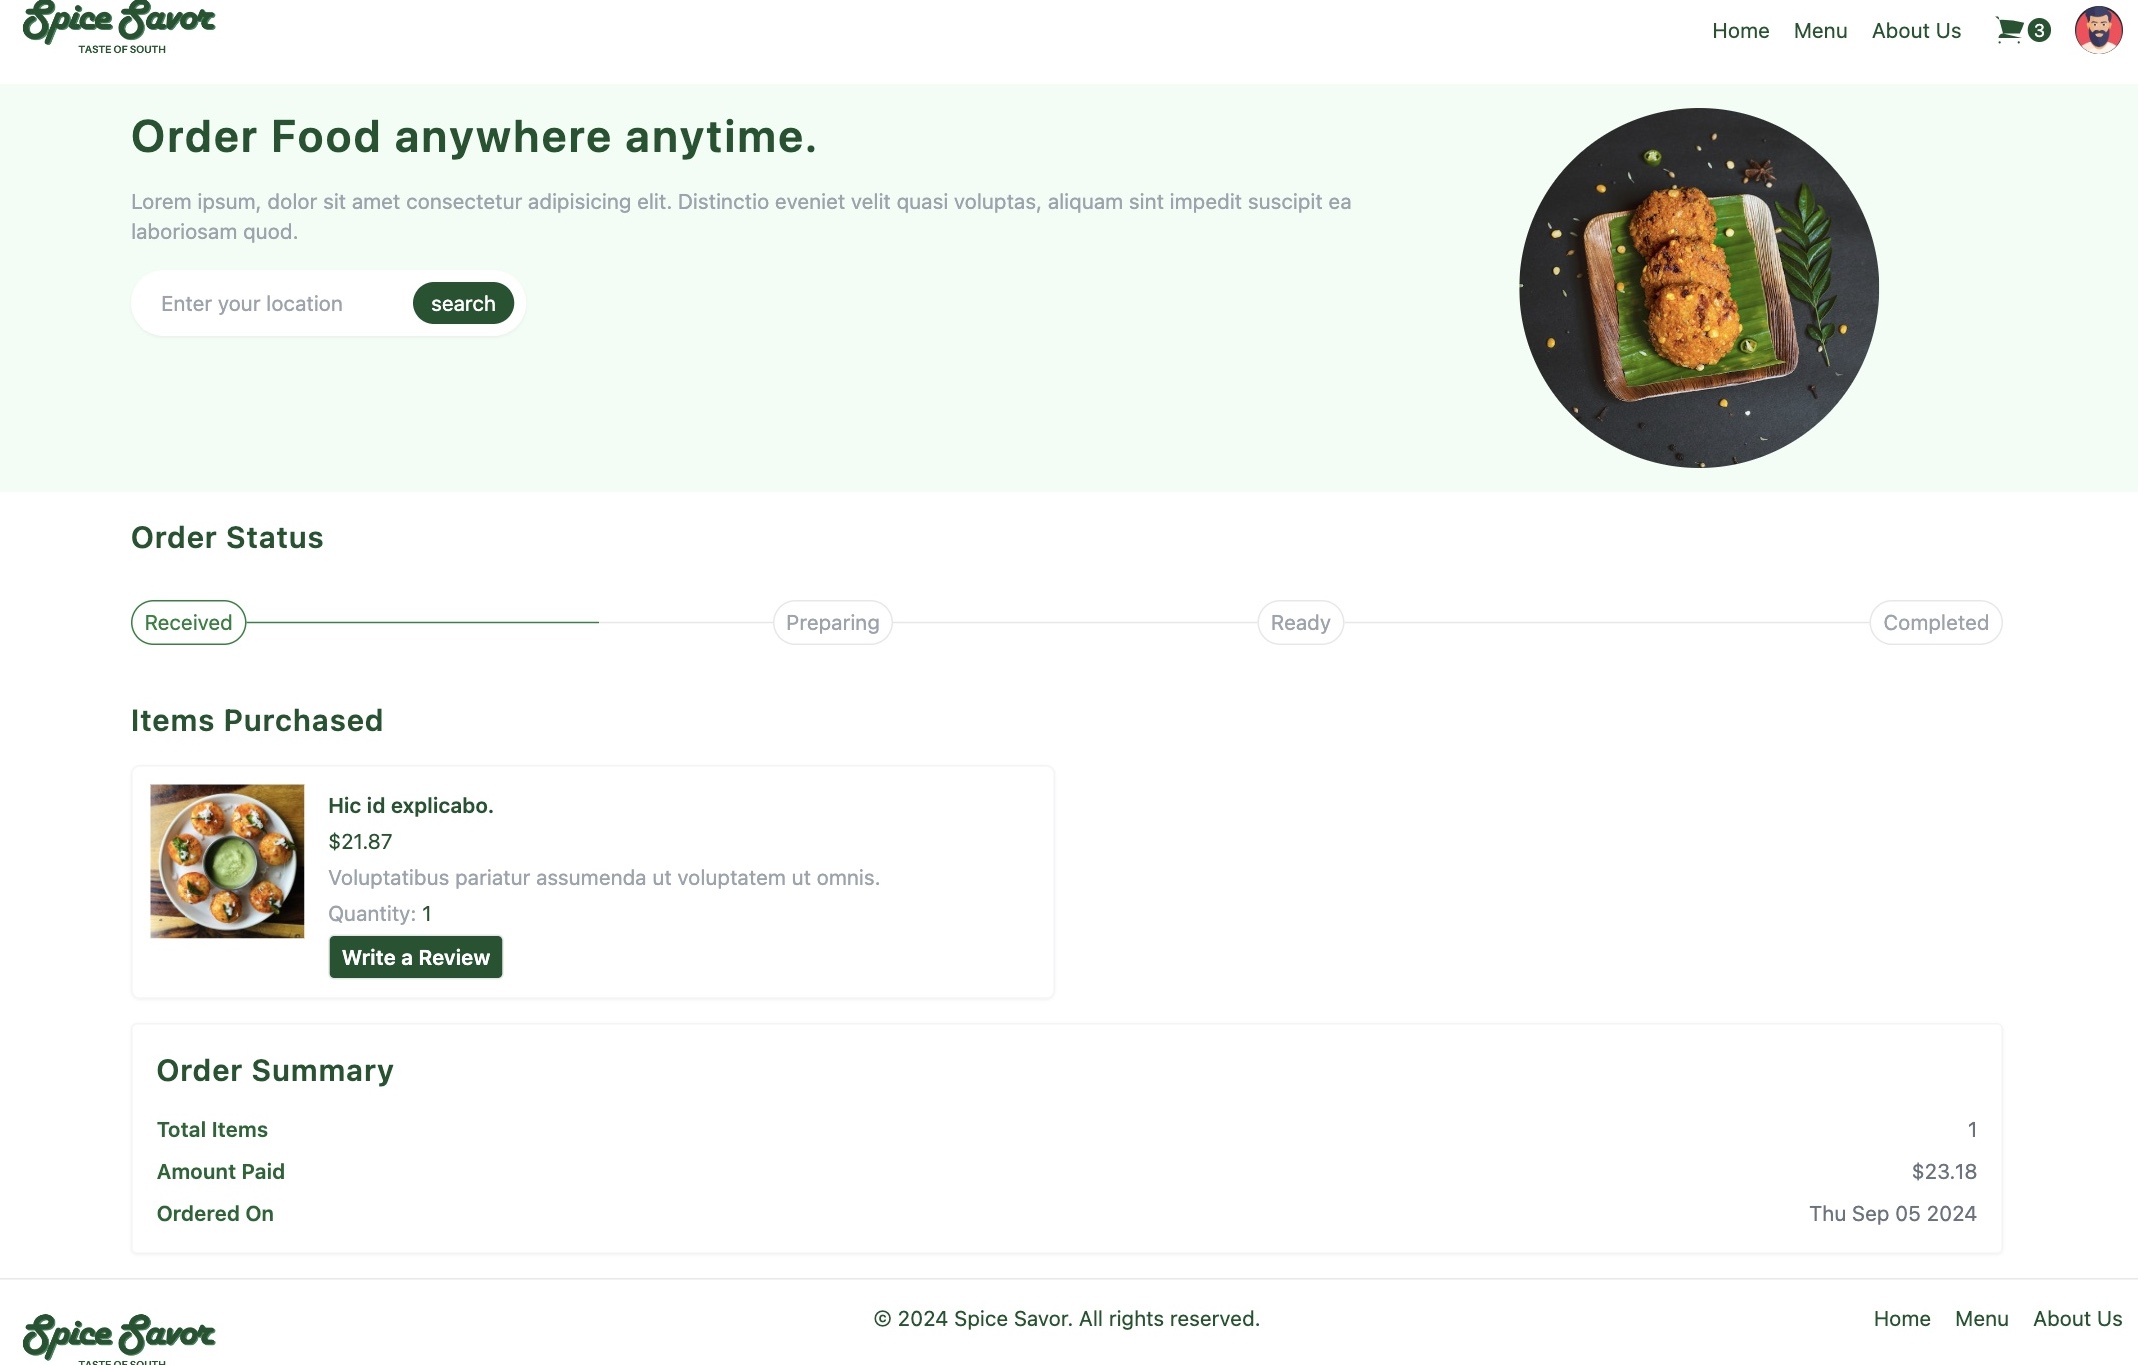
Gallery


Key Features
- Responsive design with Tailwind CSS.
- Real time notifications with Laravel Reverb
- Online payments with stripe
- Real time order tracking
- Menu and Order management
Software Used
- Vue 3 and Tailwind CSS for responsive, modern interface.
- Laravel for robust and scalable server-side implementation.
- MySQL for handling orders, user accounts and menu data.
- Stripe API intergration for secure online payments.
- Docker for local development environment.
- Deployment on standalone ubuntu server hosted on AWS.
Deployment Process
Prerequisites
- Ubuntu v22.04
- User account with sudo privileges
- Domain name to use for our application
Install Ubuntu Packages
I am using ubuntu server 22.04 to deploy the application. Let's start with installing below ubuntu packages required by the application.
  sudo apt update -y
  sudo apt-get install -y curl libpng-dev \
      libjpeg-dev libfreetype6-dev \
      libzip-dev zip unzip
MySQL Installation
I am using MySQL 8.0 as my database. You can also use PostgreSQL if you like. Below set of instructions help you install MySQL database in no time. We also use database driver for laravel queues.
  sudo apt install mysql-server -y
  sudo systemctl start mysql
  sudo systemctl enable mysql
  sudo mysql_secure_installation

  # Check status of MySQL using below command
  sudo systemctl status mysql

  # Connect to mysql as root using below command.
  sudo mysql
GIT Installation
I have chosen Github as my code repository. We are going to use Git cli tool to push and pull code from Github. If you are new to Git you can learn git from this tutorial
  sudo apt install git -y

  # Check git installation using below command
  git --version
NGINX Installation
I use NGINX web server for almost all of my applications. In this application I also use NGINX as a reverse procy to setup Laravel reverb. NGINX is a very high performant web server, easy to configure, supports SSL/TLS, used as Reverse Proxy and Load Balancer etc.
  sudo apt install nginx -y

  # Start nginx web server
  sudo systemctl start nginx

  # Enable nginx as a systemd service to start automatically at boot time on a system
  sudo systemctl enable nginx

  # Check status of nginx using below command
  sudo systemctl status nginx
PHP Installation
I am using PHP version 8.3. Below php modules are required by the application to work as expected.
  sudo apt install php-fpm php-mysql php-cli php-xml \
          php-mbstring php-curl php-gd php-pdo php-zip pvp-pcntl -y

  # Start php fpm service using below command
  sudo systemctl start php8.3-fpm

  # Enable php fpm as a systemd service
  sudo systemctl enable php8.3-fpm
Composer Installation
Composer is a dependency manager for PHP. It is required to install our application dependencies.
  cd ~
  curl -sS https://getcomposer.org/installer -o /tmp/composer-setup.php
  HASH=`curl -sS https://composer.github.io/installer.sig`
  php -r
      "if (hash_file('SHA384', '/tmp/composer-setup.php') === '$HASH') { echo 'Installer verified'; }
      else { echo 'Installer corrupt'; unlink('composer-setup.php'); } echo PHP_EOL;"
  sudo php /tmp/composer-setup.php --install-dir=/usr/local/bin --filename=composer

  # Check composer version by running below command
  composer --version
NodeJS Installation
Our application built on Inertia and Vue 3. NodeJS is required to install javascript dependencies and build our front-end code. We are using nvm to install NodeJS
  cd ~
  curl -o- https://raw.githubusercontent.com/nvm-sh/nvm/v0.39.3/install.sh | bash
  source ~/.bashrc
  nvm install v22.1.0

  # Check node installation by using below command
  node --version
Application Setup
So far we installed all the software components required to get our application up and running. Let setup our application. Application code is hosted in a Github repository [Here]. Follow along below instructions to finish application setup.
  # Switch to root user
  sudo su -

  # Application home directory
  cd /var/www/html

  # Clone app repository located below under home directory
  git clone https://github.com/iamsreepathi/food-ordering-system.git .

  # Laravel home directory
  cd src

  # Install application dependencies
  composer install --optimize-autoloader --no-dev

  # Install javascript dependencies
  npm install

  # Copy env file
  # Add database, stripe and reverb connection settings inside .env file after copying
  cp .env.example .env

  # Build static assets
  npm run build

  # Generate app key
  php artisan key:generate

  # Apply database migrations to create required database tables
  php artisan migrate
Application Environment
This section provides an example Laravel application environment I used to to deploy this application. This can be used as a reference for anyone who wants to try this setup. Please replace with your values wherever it's appropriate.
  APP_NAME="Spice Savor"
  APP_ENV=prod
  APP_KEY="${APP_KEY}"
  APP_DEBUG=true
  APP_TIMEZONE=UTC
  APP_URL="https://${DOMAIN_NAME}"

  APP_LOCALE=en
  APP_FALLBACK_LOCALE=en
  APP_FAKER_LOCALE=en_US

  APP_MAINTENANCE_DRIVER=file
  APP_MAINTENANCE_STORE=database

  BCRYPT_ROUNDS=12

  LOG_CHANNEL=stack
  LOG_STACK=single
  LOG_DEPRECATIONS_CHANNEL=null
  LOG_LEVEL=debug

  DB_CONNECTION=mysql
  DB_HOST=localhost
  DB_PORT=3306
  DB_DATABASE="${DATABASE_NAME}"
  DB_USERNAME="${DATABASE_USERNAME}"
  DB_PASSWORD="${DATABASE_PASSWORD}"

  SESSION_DRIVER=database
  SESSION_LIFETIME=120
  SESSION_ENCRYPT=false
  SESSION_PATH=/
  SESSION_DOMAIN=null

  BROADCAST_CONNECTION=reverb
  FILESYSTEM_DISK=local
  QUEUE_CONNECTION=database

  CACHE_STORE=database
  CACHE_PREFIX=

  MEMCACHED_HOST=127.0.0.1

  REDIS_CLIENT=phpredis
  REDIS_HOST=127.0.0.1
  REDIS_PASSWORD=null
  REDIS_PORT=6379

  MAIL_MAILER=smtp
  MAIL_HOST=localhost
  MAIL_PORT=1025
  MAIL_USERNAME=null
  MAIL_PASSWORD=null
  MAIL_ENCRYPTION=null
  MAIL_FROM_ADDRESS="admin@example.com"
  MAIL_FROM_NAME="${APP_NAME}"

  AWS_ACCESS_KEY_ID=
  AWS_SECRET_ACCESS_KEY=
  AWS_DEFAULT_REGION=us-east-1
  AWS_BUCKET=
  AWS_USE_PATH_STYLE_ENDPOINT=false

  VITE_APP_NAME="${APP_NAME}"
  VITE_GOOGLE_MAPS_API_KEY="${GOOGLE_MAPS_API_KEY}"

  STRIPE_KEY="${STRIPE_KEY}"
  STRIPE_SECRET="${STRIPE_SECRET}"
  STRIPE_WEBHOOK_SECRET=your-stripe-webhook-secret

  REVERB_APP_ID=221435
  REVERB_APP_KEY="${REVERB_APP_KEY}"
  REVERB_APP_SECRET="${REVERB_APP_SECRET}"
  REVERB_HOST="localhost"
  REVERB_PORT=8080
  REVERB_SCHEME=http

  VITE_REVERB_APP_KEY="${REVERB_APP_KEY}"
  VITE_REVERB_HOST="${DOMAIN_NAME}"
  VITE_REVERB_PORT=443
  VITE_REVERB_SCHEME="${REVERB_SCHEME}"
Laravel File Permissions
From above step all files are owned by root user and will result in permission denied erros when you access the website. To solve this we need to updated laravel file permissions as below. You can use below permissions to any laravel application
  # Switch to root user
  sudo su -

  # Application home directory
  cd /var/www/html

  # Change file permission of laravel files and folders
  chmod 755 -R /var/www/html/src/

  # Change file permissions of logs and cache folders
  chmod 775 -R /var/www/html/src/storage/ /var/www/html/src/bootstrap/cache

  # Change ownership of code files and folders
  chown -R ubuntu:www-data /var/www/html/src/

  # Restart nginx
  systemctl restart nginx
Configuration Files
In the next steps we see how to install supervisor and configure our app using NGINX and we need below configuration files. List of configuration files required for our application. These files are hosted on on github and available for download. Download these files over to ubuntu server.
Supervisor Installation
In our application we use Laravel reverb and Laravel queues. Laravel Reverb provides scalable real-time WebSocket communication directly to our application. Laravel queues are used to perform long running tasks. Supervisor is a process monitor used to configure laravel reverb and queues.
  sudo apt-get install supervisor

  # Download supervisord.conf file configuration files section.
  # copy supervisord.conf config to /etc/supercisor/conf.d/supervisord.conf
  # Restart supervisor
  sudo systemctl restart supervisorctl

  # Check status of laravel-worker by running below command
  sudo supervisorctl status laravel-worker:

  # Check status of laravel-reverb by running below command
  sudo supervisorctl status laravel-reverb:

  # Download default nginx configuration file from configuration files section.
  # copy nginx default config to /etc/nginx/sites-available/default
  # Reload nginx to reflect configuration changes
  sudo systemctl reload nginx
SSL Configuration
SSL & TLS are essential for securing communication over the internet. SSL/TLS encrypts data transmitted between client browser and an application server. We use certbot to configure a free SSL certificate.
  sudo apt update -y
  sudo apt install certbot python3-certbot-nginx

  # Replace with your domain name
  sudo certbot --nginx -d yourdomain.com

  # Reload nginx to reflect configuration changes
  sudo systemctl reload nginx
Conclusion
Deploying a Laravel-based food ordering application using Laravel Reverb, Vue 3, Inertia.js, and Tailwind CSS offers a powerful and modern solution for building dynamic and responsive user interfaces with a seamless full-stack experience. By integrating Vue 3 as the front-end framework via Inertia.js, you can leverage the reactivity and modularity of Vue while maintaining Laravel’s routing and backend capabilities. Tailwind CSS simplifies the styling process, allowing for fast, responsive designs without the need to write extensive custom CSS.
Incorporating continuous integration and delivery (CI/CD) pipelines will further streamline updates and new feature releases, ensuring that the application remains scalable, secure, and highly performant as the business grows.
For questions and queries please reach via below email